


Adding a modern image gallery slider to your WooCommerce product pages is one of the easiest ways to improve user experience, engagement, and conversions. A static gallery often feels outdated, while a slider gives customers a smooth, interactive way to explore products.
In this guide, you’ll learn multiple methods (beginner → advanced) to add a product gallery slider in WooCommerce.
Why Use a Product Gallery Slider?
Before jumping into implementation, here’s why it matters:
- Improves product visualization
- Increases conversion rate
- Enhances mobile experience
- Makes your store look modern and premium
- Reduces bounce rate
Method 1: Use a Plugin (Recommended)
The easiest and most scalable way is using a dedicated gallery plugin.
Best Option:
Other alternatives:
Steps:
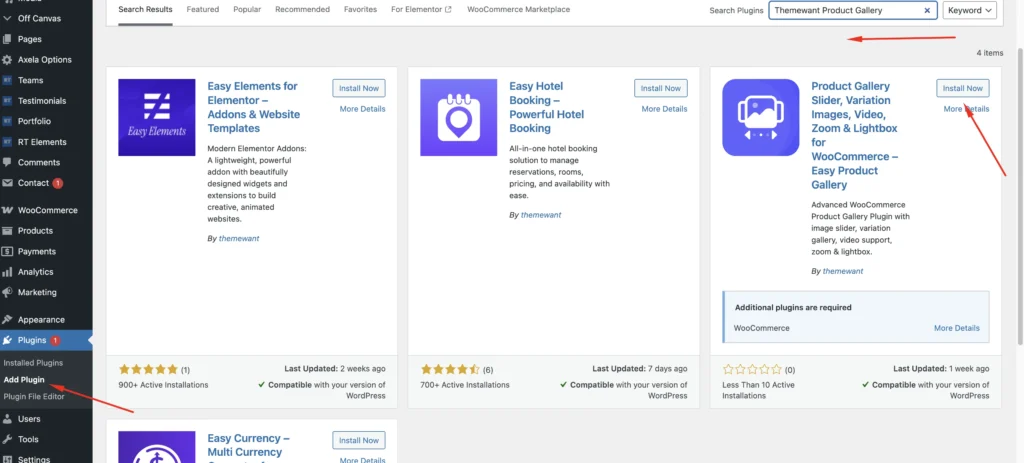
- Go to Plugins -> Add Plugin
- Search The Plugin – with themewant product gallery
- Install & Activate It
Then go Product -> Add New Porduct/Edit Product. Then you can add product gallery images easily and see the action.
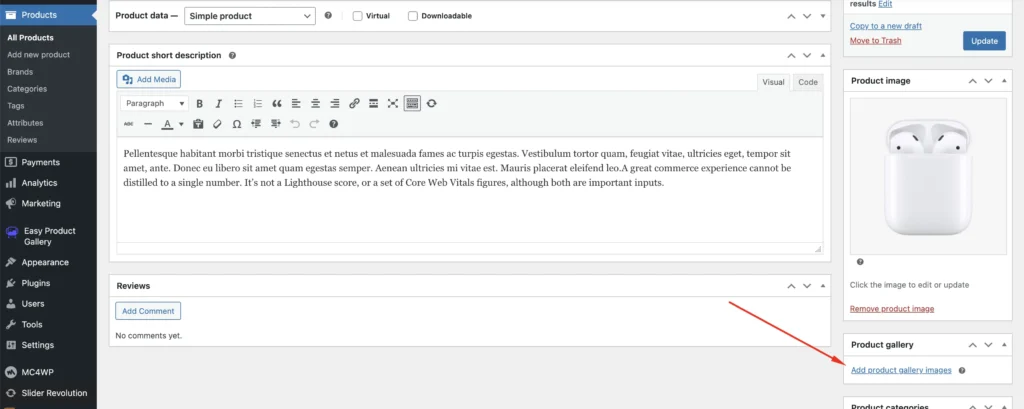
✅ Done! Your product gallery is now a slider and looks like this.
Method 2: Add Gallery Slider via Page Builders
If you’re using a builder like:
- Elementor
- Gutenberg
Elementor Method:
- Edit product template
- Add Product Images Widget
- Enable:
- Slider mode
- Thumbnails
- Navigation arrows
- Style spacing, hover, transitions
Method 3: Custom Code (Advanced)
If you want full control, override the WooCommerce gallery using JS slider libraries.
Example using Swiper:
Step 1: Enqueue Swiper
function add_swiper_assets() {
    wp_enqueue_style('swiper-css', 'https://cdn.jsdelivr.net/npm/swiper/swiper-bundle.min.css');
    wp_enqueue_script('swiper-js', 'https://cdn.jsdelivr.net/npm/swiper/swiper-bundle.min.js', [], false, true);
}
add_action('wp_enqueue_scripts', 'add_swiper_assets');
Step 2: Override Product Gallery HTML
Copy:
woocommerce/single-product/product-image.phpinto your theme and customize markup.
Step 3: Initialize Slider
new Swiper('.product-gallery', {
  slidesPerView: 1,
  spaceBetween: 10,
  navigation: {
    nextEl: '.swiper-button-next',
    prevEl: '.swiper-button-prev',
  },
  thumbs: {
    swiper: new Swiper('.thumbnail-gallery', {
      slidesPerView: 4,
    }),
  },
});
Method 4: Show Product Gallery Slider Inside Blog Posts
Now the important part (your question 👇)
Use Case:
You want to show the WooCommerce product gallery inside a blog post
Option A: Shortcode
[products ids="123"]But this won’t show a full slider.
Option B: Custom Shortcode (Recommended)
Create a shortcode to display gallery:
function custom_product_gallery($atts) {
    $atts = shortcode_atts([
        'id' => '',
    ], $atts);

    $product = wc_get_product($atts['id']);
    $attachment_ids = $product->get_gallery_image_ids();

    ob_start();

    echo '<div class="custom-product-slider swiper">';
    echo '<div class="swiper-wrapper">';

    foreach ($attachment_ids as $id) {
        $img = wp_get_attachment_image($id, 'large');
        echo '<div class="swiper-slide">'.$img.'</div>';
    }

    echo '</div></div>';

    return ob_get_clean();
}
add_shortcode('product_gallery_slider', 'custom_product_gallery');
Usage in Blog Post:
[product_gallery_slider id="123"]Final Thoughts: How to Add Image Gallery Slider in WooCommerce Product
A product gallery slider is no longer optional—it’s a conversion tool.
If you want:
- Quick setup → use a plugin
- Design control → use Elementor
- Full flexibility → use custom code
